


「Kindleで買った電子書籍にiPadで自由に書き込めたらもっと勉強が捗るのに…」と思う方に、Goodnotes(Goodnotes 6、GoodNotes 5)を使ったkindle書籍への書き込み手順を紹介します。
 ちゃろぼ
ちゃろぼKindleで買った電子書籍にメモしたい、マーカーを引きたいとお考えの方は、今回紹介する方法を試してみてください。
目次
Goodnotesに
Kindleで買った電子書籍を読み込む手順
STEP
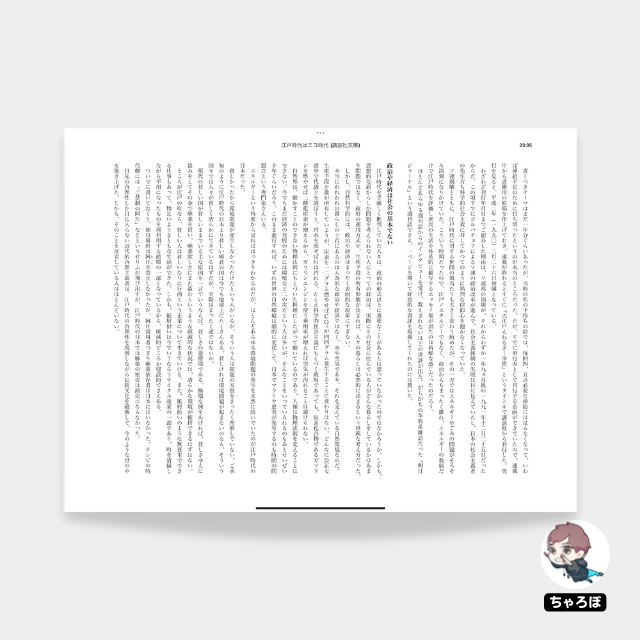
電子書籍のスクリーンショットを撮る
まず、Goodnotes(Goodnotes 6、GoodNotes 5)に読み込みたい書籍のスクリーンショットを撮ります。
STEP
スクリーンショットで撮った画像をGoodnotes 6で開く
次は、スクリーンショットで保存した画像をGoodnotes(Goodnotes 6、GoodNotes 5)に読み込みますが、その方法が2つあります。
Goodnotesに画像を読み込む
2つの方法
- アプリ内の画像一覧から追加する
- Split Viewからドラッグ&ドロップで挿入する
アプリ内の画像一覧から追加する
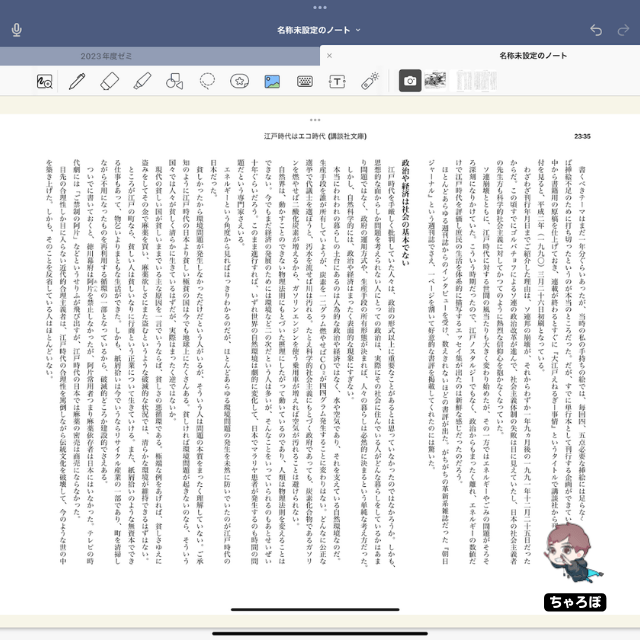
ノートの右上のカメラマークの横に「写真」に保存されている画像が出てくるので、そこから、スクリーンショットをノートに追加する方法です。
Split Viewからドラッグ&ドロップする
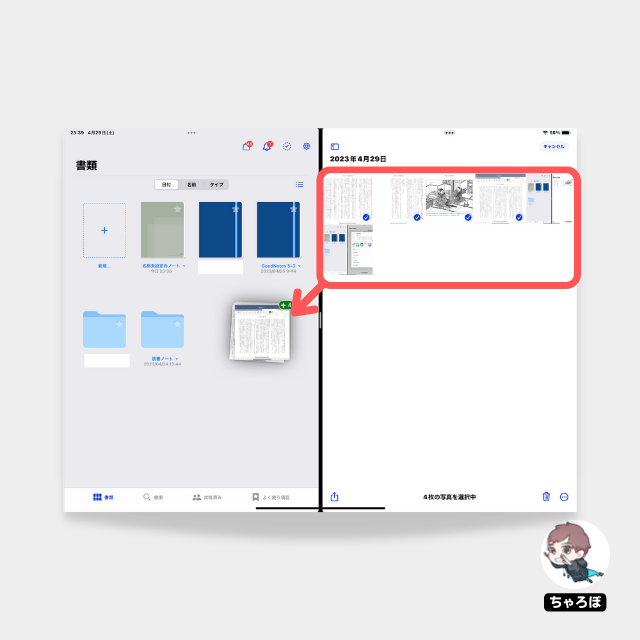
Goodnotes(Goodnotes 6、GoodNotes 5)と「写真」アプリをSplit Viewで開き、「写真」アプリで写真を選択し、そのまま画像をGoodnotesにドラッグする方法です。
Goodnotes 6に取り込めば
ペンツールを使って書き込みができる
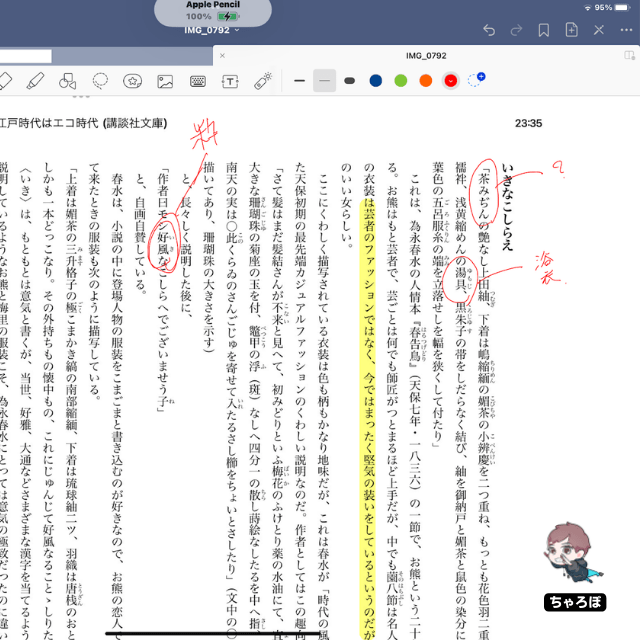
あとは、Goodnotes(Goodnotes 6、GoodNotes 5)のペンツールを使って思う存分に書き込むことができます。
Goodnotes 6はPDFとの相性が良い
ちゃろぼGoodnotes(Goodnotes 6、GoodNotes 5)のノートに取り込んでしまえば、PDFで保存ができたり、自由に書き込みができるので、こちらの方法も身に着けておきましょう。
あわせて読みたい

GoodNotes 5で作ったノートをPDF化する方法
GoodNotes 5で作ったノートをPDF化する方法はありますか? そのノートを開いた状態で「共有アイコン」→「すべてを書き出す」もしくは「このページを書き出す」→「PDF」…
あわせて読みたい
GoodNotes 5でPDF化・保存するときのサイズと選び方
GoodNotes 5では、デフォルトの用紙サイズが「GoodNotes標準」になっています。これはA4サイズよりも小さいため、「GoodNotes標準」のままPDF化するとA4サイズの用紙で…
あわせて読みたい
GoodNotes 5で写真をまとめてPDFにする方法
iOS標準の「写真」アプリでもPDFに変換できますが、選べる寸法にA4、B5サイズが無いのが不便なところ。一方で、GoodNotes 5でノートにできてしまえば、GoodNotesから好…